Navigation and proofreading are done in Neuroglancer (most recent Spelunker branch). The dataset is accessible here.
Registering To Navigate and Proofread with CAVE
- Apply for a CAVE account by submitting this form. We will respond to your application within 24 h.
- After you’ve been approved, open one of the links above and click the Login button at the bottom of the Neuroglancer page. You must use the same email address you provided through your application’s Google form.
- If you do not yet feel confident proofreading, we will initially grant view-only access to allow you time to explore the dataset and complete the necessary training.
Navigation
- Basic instructions can be found in the MICrONS Explorer website here, here and in this Eyewire video
- The dataset contains multiple layers that can be toggled on and off by clicking on the tab or using the corresponding number key.

Rendering options for each layer can be modified by right clicking on the layer tab. This will open a panel to the right of the screen.
1. imgcorresponds to the EM images2. segcorresponds to the EM segmentation3. em_downsampledcorresponds to the EM images downsampled at 512 × 512 × 480 nm for faster browsing. This layer also helps when overlaying the two-photon imaging stacks (see below).4. tg_huc_h2b_gcamp7fis a registered two-photon imaging stack of the nuclear calcium indicator GCaMP7f under the elavl3 promoter.5. tg_gad1b-dsred_kdlr-mcherry-caaxis a registered two-photon imaging stack of red fluorescent reporters that label the main inhibitory neuronal subtype (gad1b:DsRed) and vascular endothelial cells (kdrl:mCherryCAAX).6. functional masksFunctional masks are spatial masks registered from the two-photon functional imaging planes. Each mask corresponds to a unique neuronal ID, which can be used to retrieve activity data via custom Jupyter Notebooks (see the Tutorials page). Mask IDs can be accessed by clicking on a mask and checking the Seg. tab in the right panel, or simply by hovering over a mask — the ID will appear directly in the functional masks layer tab. In the link above the neuron with ID 9978 is displayed.7. synapsesdescribes how to render imagery.8-11. MECE0_3are masks of the MECE (mutually exclusive collectively exhaustive) regions at multiple precision levels. Right clik on the layer to visualize the regions available.12. annis a manual annotation layer, allowing the user to add annotations to the data (Ctrl + Click, either in the 2D or 3D panel). You need to right click on the layer tab to add annotations.
Making Proofreading Edits
Proofreading in the Fish1.5 dataset is done in the same navigation link as above. Make edits only when confident—they’ll improve segmentation, you are contributing to a community effort. To get started here’s a quick guide on editing within Neuroglancer:
-
Merging two segments (Correct Split Errors)
The link above has shortcuts for merge and cut operations already defined. You can merge multiple pairs of segments at once. A single bulk merge can merge up to 10 pairs of segments.- Select the segments yo want to merge
- Press
Mto open the merge menu. This should appear in the bottom left of the screen.
Ctrl + Clickon segment 1 (2D or 3D) to draw a red line; thenCtrl + Clickon segment 2. You will see the red line connecting the two segments. If done successfully, both segments will appear in the merge menu.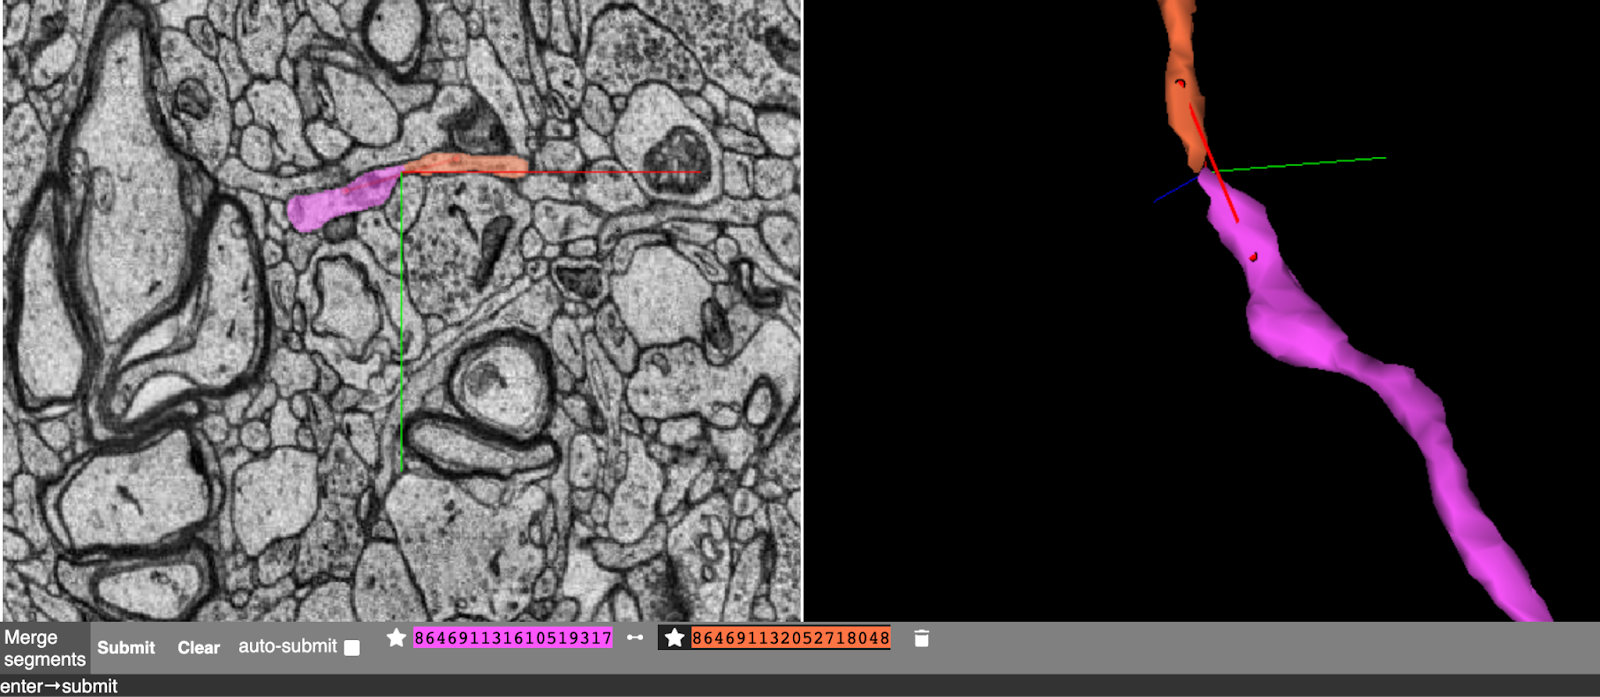
- This process can be repeated up to 10 times before submitting the merge request.
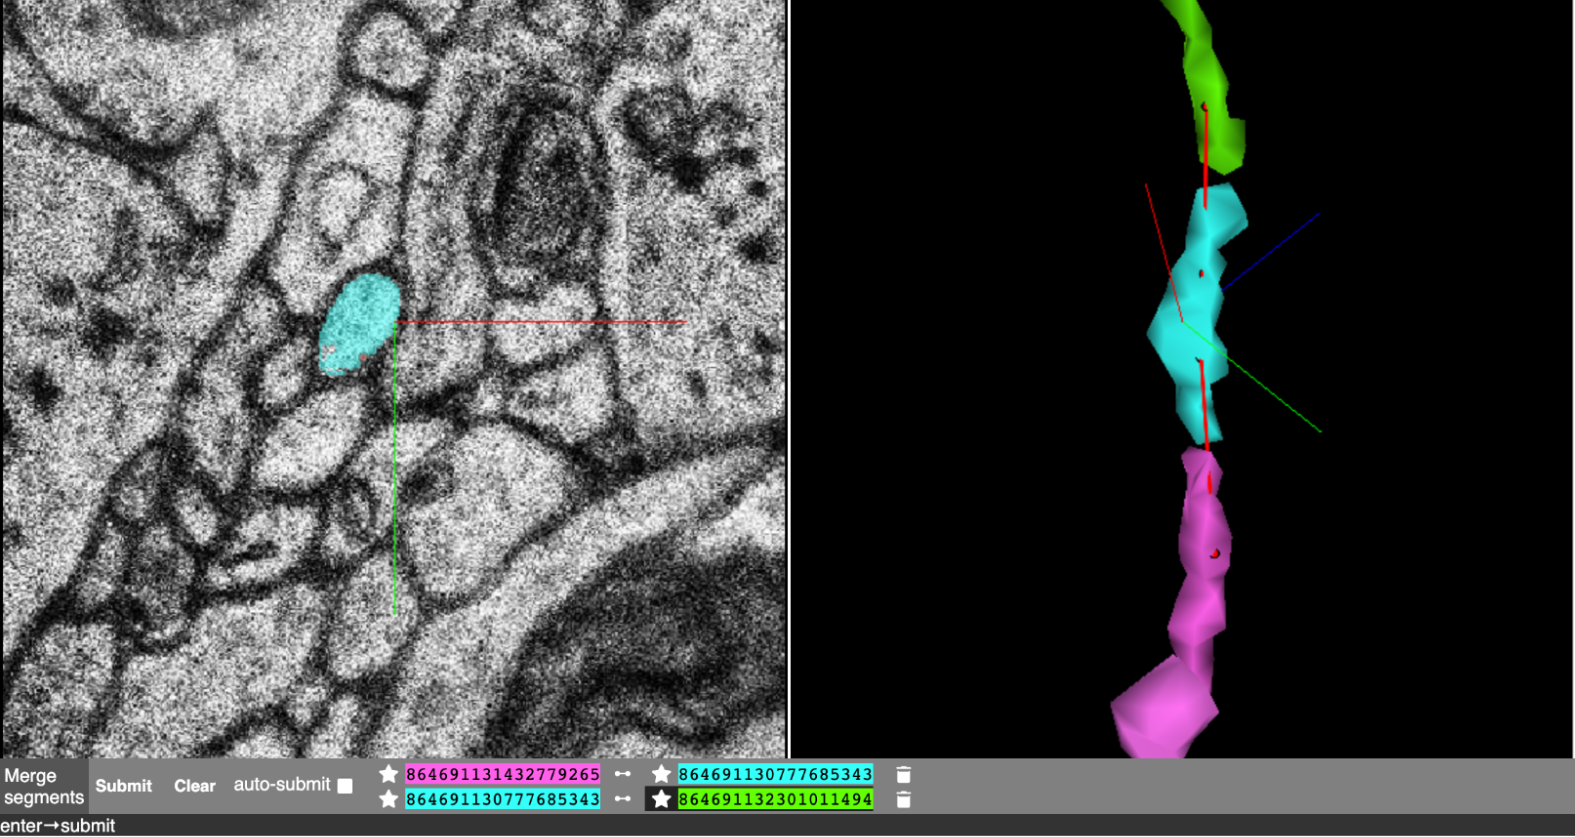
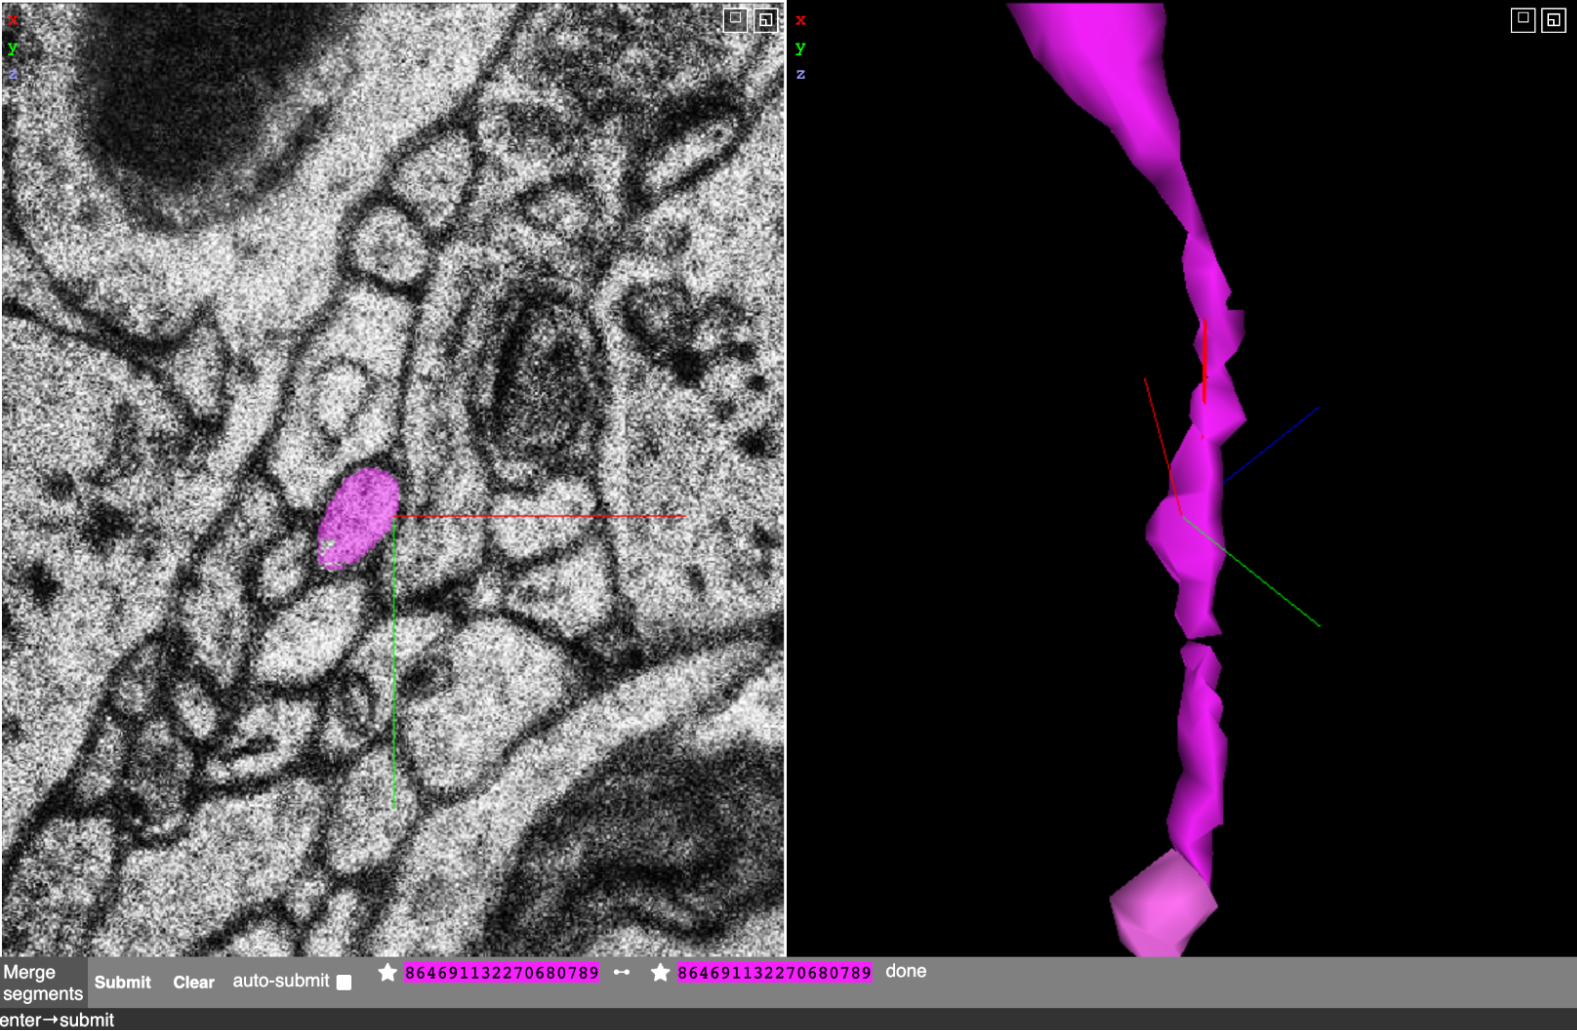
- Click Submit to merge selected segments; merged ones render in the same color.
- If you have enabled auto-submit, the request will be sent automatically after selecting each segment pair.
- You can click
Clearto cancel all your selections or cancel a selection one by one using the Trash icon.
- Cut a segment in two (Correcting Merge Errors)
- Go to the Graph Tab in the neuroglancer settings. In the above link, the merge feature is bound to the C key. Make sure you are in the Graph Tab and not (!) in the Seg. Tab.
- Press
Cto open the cutting menu.
- In the 3D view, place points around the region you want to split on mesh 1. To place points hold Shift + Control while you click on a mesh.
- After you placed points on mesh 1, click Swap before you place points on mesh 2
- After you place points on both sides of the desired cut, it should look similar to this:
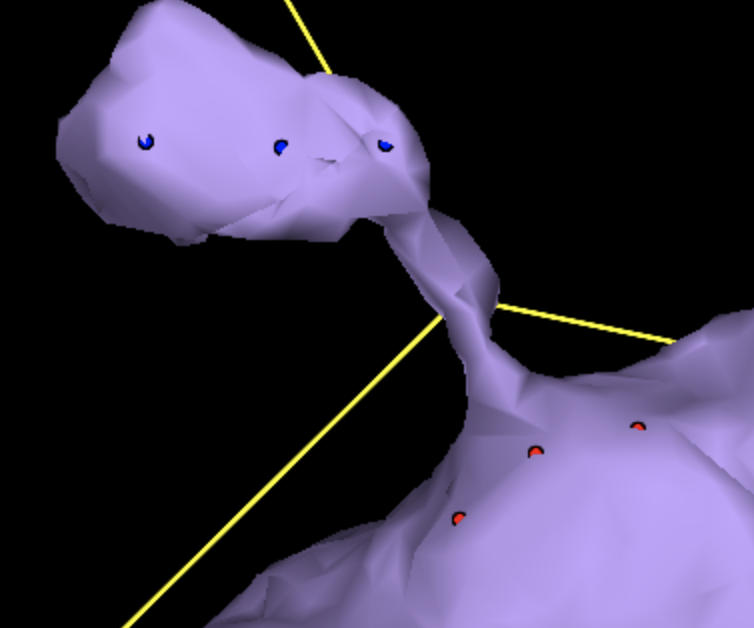
- Click Submit to perform the cut. After a few seconds, you should see both sides of the cut in separate colors. After reloading neuroglancer, the meshes will update.
- Setting shortcuts for edit commands
If you want to change those shortcuts, you can bind new keys. In the Graph tab, Click & hold the mouse over the Merge or Multicut field. Next, hit the key you want to bind to the operation. The letter next to the field will update if the new shortcut was set successfully.
Shift + A → Merge
Shift + C → Cut